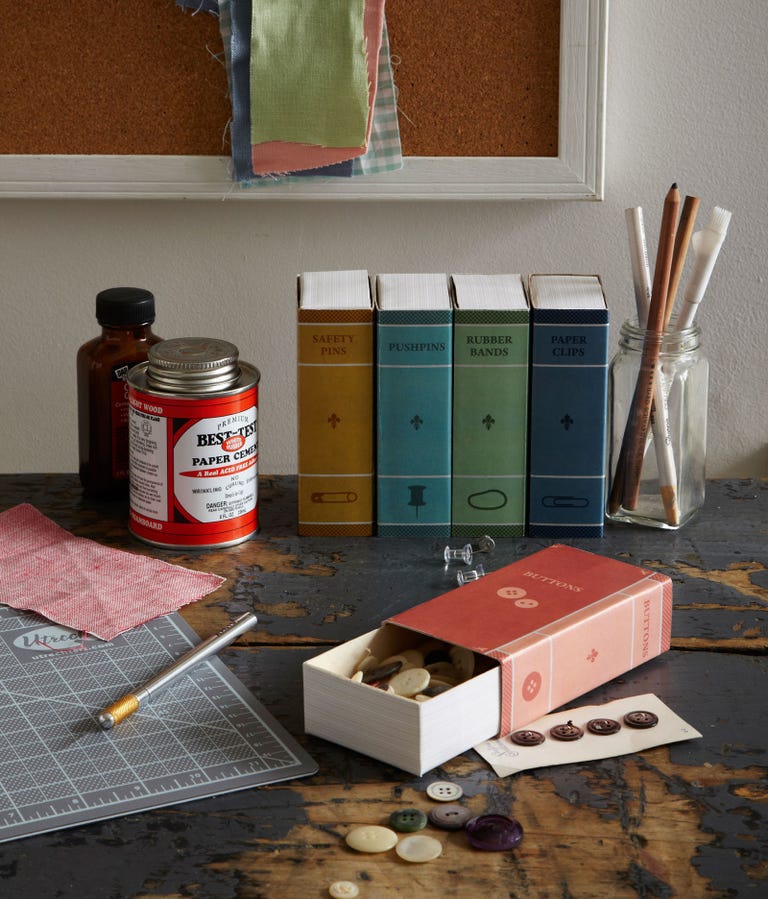

These delightful little volumes (inspired by Heather Mann of dollarstorecrafts.com) throw the book at desktop clutter. To transform ordinary matchboxes into match-"book" containers, print all five dust-jacket images, sized to fit basic 300-count matchboxes, from countryliving.com/
matchboxcovers. Cut out and adhere the covers and pages to your matchboxes using spray mount. Then fill 'em up with the items referenced on the spines, and shelve
.
Talk about a perfect fit: The eight chipboard pieces that form the base of this heart-shaped puzzle cost just $1.20 (5"W × 4⅜"H; studiocee.etsy.com).
Step 1: Choose a digital image, resizing it, if needed, to at least 6"W x 5"H. Print onto matte photo paper.
Step 2: Snap the jigsaw pieces together and lay them on top of your photo, then trace around the puzzle's perimeter with a pencil. Cut out the resulting heart shape.
Step 3: Turn the photo and all the puzzle pieces facedown. Position the bottommost puzzle piece along the corresponding part of the back of the photo. Trace closely around the puzzle piece with a pencil, then remove. Repeat with the remaining puzzle pieces.
Step 4: Carefully cut out each jigsaw shape from your photo with scissors (the smaller, the better). Use an acid-free glue stick to mount each cutout, faceup, to its matching puzzle piece, also faceup. Slip the pieces in an envelope, and seal—if you like—with a kiss.

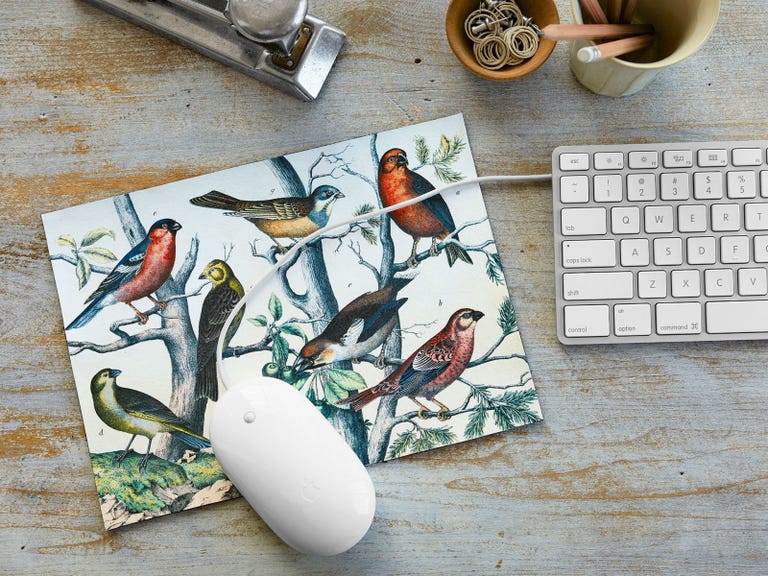
Build a better mouse pad: Put a bird—or seven—on it! Download the free illustration above. Resize the image to 10"W x 7 1/4"H and print onto fabric-transfer paper (dark T-shirt transfer sheets, $7.99 for three; junetailor.com). Cut out the image from the transfer paper, remove the backing, and place, right side facing up, on the smooth side of a piece of top-grain leather ($7.99; 8 1/2"W x 11"L; michaels.com for stores). Iron the image onto the leather, following the transfer-paper package instructions, and trim away the excess leather bordering the flock.
A carrier pigeon, clad in a vintage-postcard print—could there be a wittier way to convey your wedding's pecking order? We fell for the concept upon spying it in Clare Youngs's Book Art (Cico, $21.95). Then we simplified the process for you: Just print our placecard art onto 8½"W x 11"L card stock, cut out, and fold in half as directed. To equip each pigeon with a message, write a guest's name on a 5/16"W x 6"L strip of paper and curl the ends by wrapping them around a pencil. Then loop the strip around the bird's front leg before perching him atop a plate.
Sharing your garden bounty can mean more than handing out juicy tomatoes. Why not also pass along homegrown vegetable seeds? Learn how to harvest them at seedsave.org—then package those future plans in our sweet little DIY envelopes. Simply download the free PDF (plus instructions), then print on earthy paper, fold, and give the gift of gardening for mere pennies. (Recycled paper, $10 for 100 sheets; jampaper.com)
"Stitch" up a colorful paper quilt—no sewing necessary! Inspired by a post on lindaandharriett.blogspot.com, this playful take on a folk-art staple offers a smart way to repurpose scraps of paper. (We used open stock: from 99 cents per 12-inch-square sheet; michaels.com for stores.) Select four different patterned papers; cut 20 two-inch squares from three of them and 21 two-inch squares from the fourth (the extra square will serve as the center of your quilt). Following our pattern template, adhere the squares to an 18-inch-square illustration board using a glue stick. Then, pop the quilt in a frame to show off your handiwork (similar 20-inch-square frame, $47.82; salinepictureframe.com).
Get right to the point with photorealistic magnets. The key to crafting these sharp fridge accessories? Adhesive magnet paper ($7.29 for 12"W x 24"L sheet; promagproducts.com). Simply download our PDF (containing these dart and pushpin photos), and print it out on computer paper. Next, pull the magnet sheet's paper layer away to reveal the magnet's adhesive side, and place your printed images atop the adhesive. Smooth out any bubbles before cutting out each image with sharp scissors, working close to the images. Then, take aim at the fridge to see your handiwork hold tight.
Near a favorite reading chair, present a page-turning vignette. Paint a silhouette on a backdrop of book pages. Then cut vase shapes to give text three dimensions. Get the drections to make paper vases »
Postcards, matchbooks, and coins tell the stories of our travels, but back home these trinkets tend to get lost in a junk drawer. Instead, give vacation souvenirs—as well as snapshots—a more fitting home with this project adapted from Paper + Craft ($19.95; Chronicle).
Step 1: To source the geographical shape of your travel destination, type its name (Hawaii, Africa, Manhattan, etc.) and the word silhouette into Google. Print out a resulting image and use a copier to resize it to fit on the lid of a small white box
($.99 each, 4½"W x 6"L x 4½"H; containerstore.com for stores).
Step 2: Cut out the silhouette, then trace it onto the prettiest section of a colorful map of your destination.
Step 3: Next, cut the shape out of the map and use a glue stick to paste it onto the box's lid.
Step 4: Finish by affixing a label on the lid and writing in the location and dates of your journey.
Reward a great quote (we cribbed from The Wizard of Oz) with the gallery treatment, courtesy of this project adapted from Meg Mateo Ilasco's Crafting a Meaningful Home ($24.95; STC Craft).
Step 1: Lay a piece of poster board on a flat surface. Use letter stencils ($7.69 for a set; staples.com) to spell out the phrase of your choice on the board, experimenting until you find a placement you like. (Use a ruler and pencil to mark horizontal lines for guidance.)
Step 2: Spell out the phrase backward, then flip the stencils over (you'll be turning the board over when you're done, and the words will then read correctly). Trace the letters onto the board with a pencil.
Step 3: Carefully cut out the letters with an X-Acto knife, then use hem tape to affix a patterned piece of fabric to the poster board. Flip the poster board over to reveal the finished artwork, then frame.
Step 1: For each flower, cut six 7-inch squares from the pattern. Stack and fold them accordion-style six times, forming a one-by seven-inch rectangle. Snip off the corners of the rectangle with scissors.
Step 2: Tightly twist a wire floral stem around the center of the rectangle.
Step 3: Fan out the paper, then pull apart each layer, creating the blossom.
For a thoughtful gift, create one of these simple lavender-filled-heart cards. First, cut card stock to desired size and fold vertically in the center. Cut two heart shapes from printed muslin. Stitch them together, outsides in, leaving a small opening; invert the hearts and loosely fill with lavender. Stitch the opening closed and attach the heart to the card.
Learn to fold these charming paper-hat place cards, then add colorful bands, rosettes, and toppers. Make a sparkling hat topper by coiling a metallic pipe cleaner around a pencil, then carefully inserting the pipe cleaner into the top of the hat. Print or hand-stamp a name banner and trim with pinking shears. Fold hats using newspaper or red, white, and blue crepe paper. Look for striped and dotted paper, too.
Original article and pictures take www.countryliving.com site
Комментариев нет:
Отправить комментарий