
I recently received an unexpected note from Clemence who writes Oh The Lovely Things. It came so out of the blue it really got me thinking about the way I chose communicate with my friends and family. Most day to day texts, messages and emails are a flurry of information, hastily tapped out, thoughtless sentences that are crudely strung together. No creativity, no story. Just the facts and we’ll talk more about it face to face later.
And then there’s that other category; the people you’ve never met in real life but “speak” to on a regular basis. These last category can generally be the people I spend the most time writing replies to and developing relationships with. As much as I try to distinguish my personality in the words doesn’t it all feel so impersonal typing out emails that will inevitably end with the emotionless prerequisite of “Kind regards” or “Best wishes”. Boring right? We mean well but the words are so threadbare they barely register with any reader any more.
But when it comes to letter writing there’s something more permanent to the conversations. There’s a reason to embellish and a purpose to entertain. Letters are awaited and the words are cherished. Each one can be it’s own small work of art, including the stationary it’s written on! Who says envelopes cannot reflect our personalities as well? I couldn’t think of anything that portrays my current style better than this marbled contact paper, so I went for it!

Materials:
Envelopes
Pen
Scissors
Instructions:
1. Open out an envelope. I have this lovely gold shiny one the original note was sent in.
2. Place it onto the contact paper and trace around the outside. I’ve gone a few millimetres out from the envelopes edge to give me a little wiggle room and because I didn’t want to make the edge of the envelope.
3. Cut out the contact paper envelope template.

4. Cut a small section from the ‘arms’ of the ready made envelopes. You can play spot the difference with the images above and below to see what I’ve cut off.
5. Slowly peal back the backing off the contact paper and stick the back/inside of the ready made envelope it.
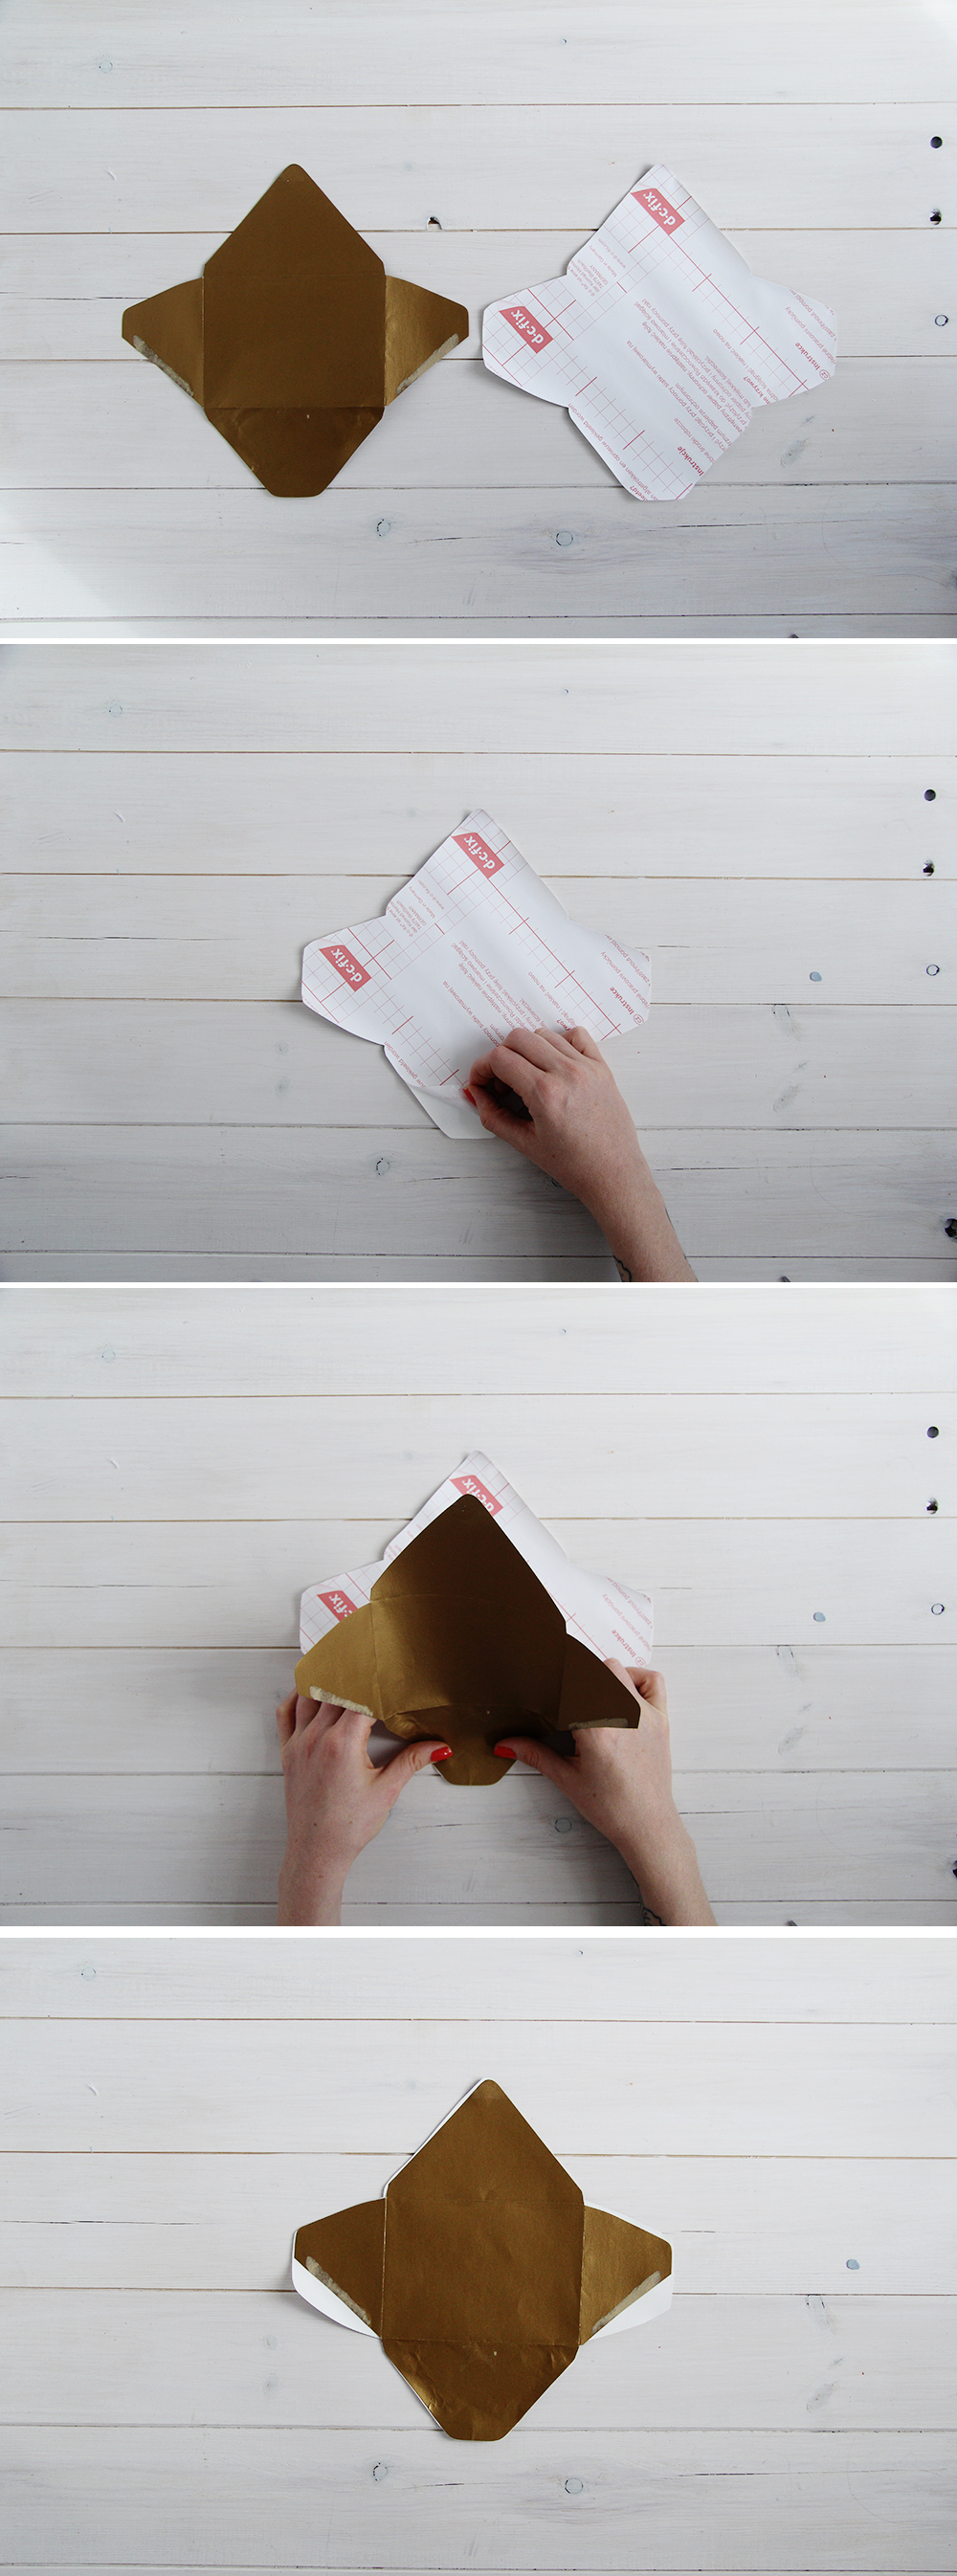
6. Press out any air bubbles.
7. Trim the excess contact paper so all edges line up neatly except the exposed section of the arms we originally cut off the ready made envelopes. Don’t cut this section off (see 3rd image down)
8. Start folding the envelope back into shape starting with the bottom tab. Fold it up so the ready made envelope in on the inside and the contact paper in now the outside of the envelope.

9. Now fold both the sides inwards and press them down where the contact paper is exposed.
10. Finally fold the top tab down. To seal you can peal back the envelope from the contact paper and use that the adhere the envelope closed.
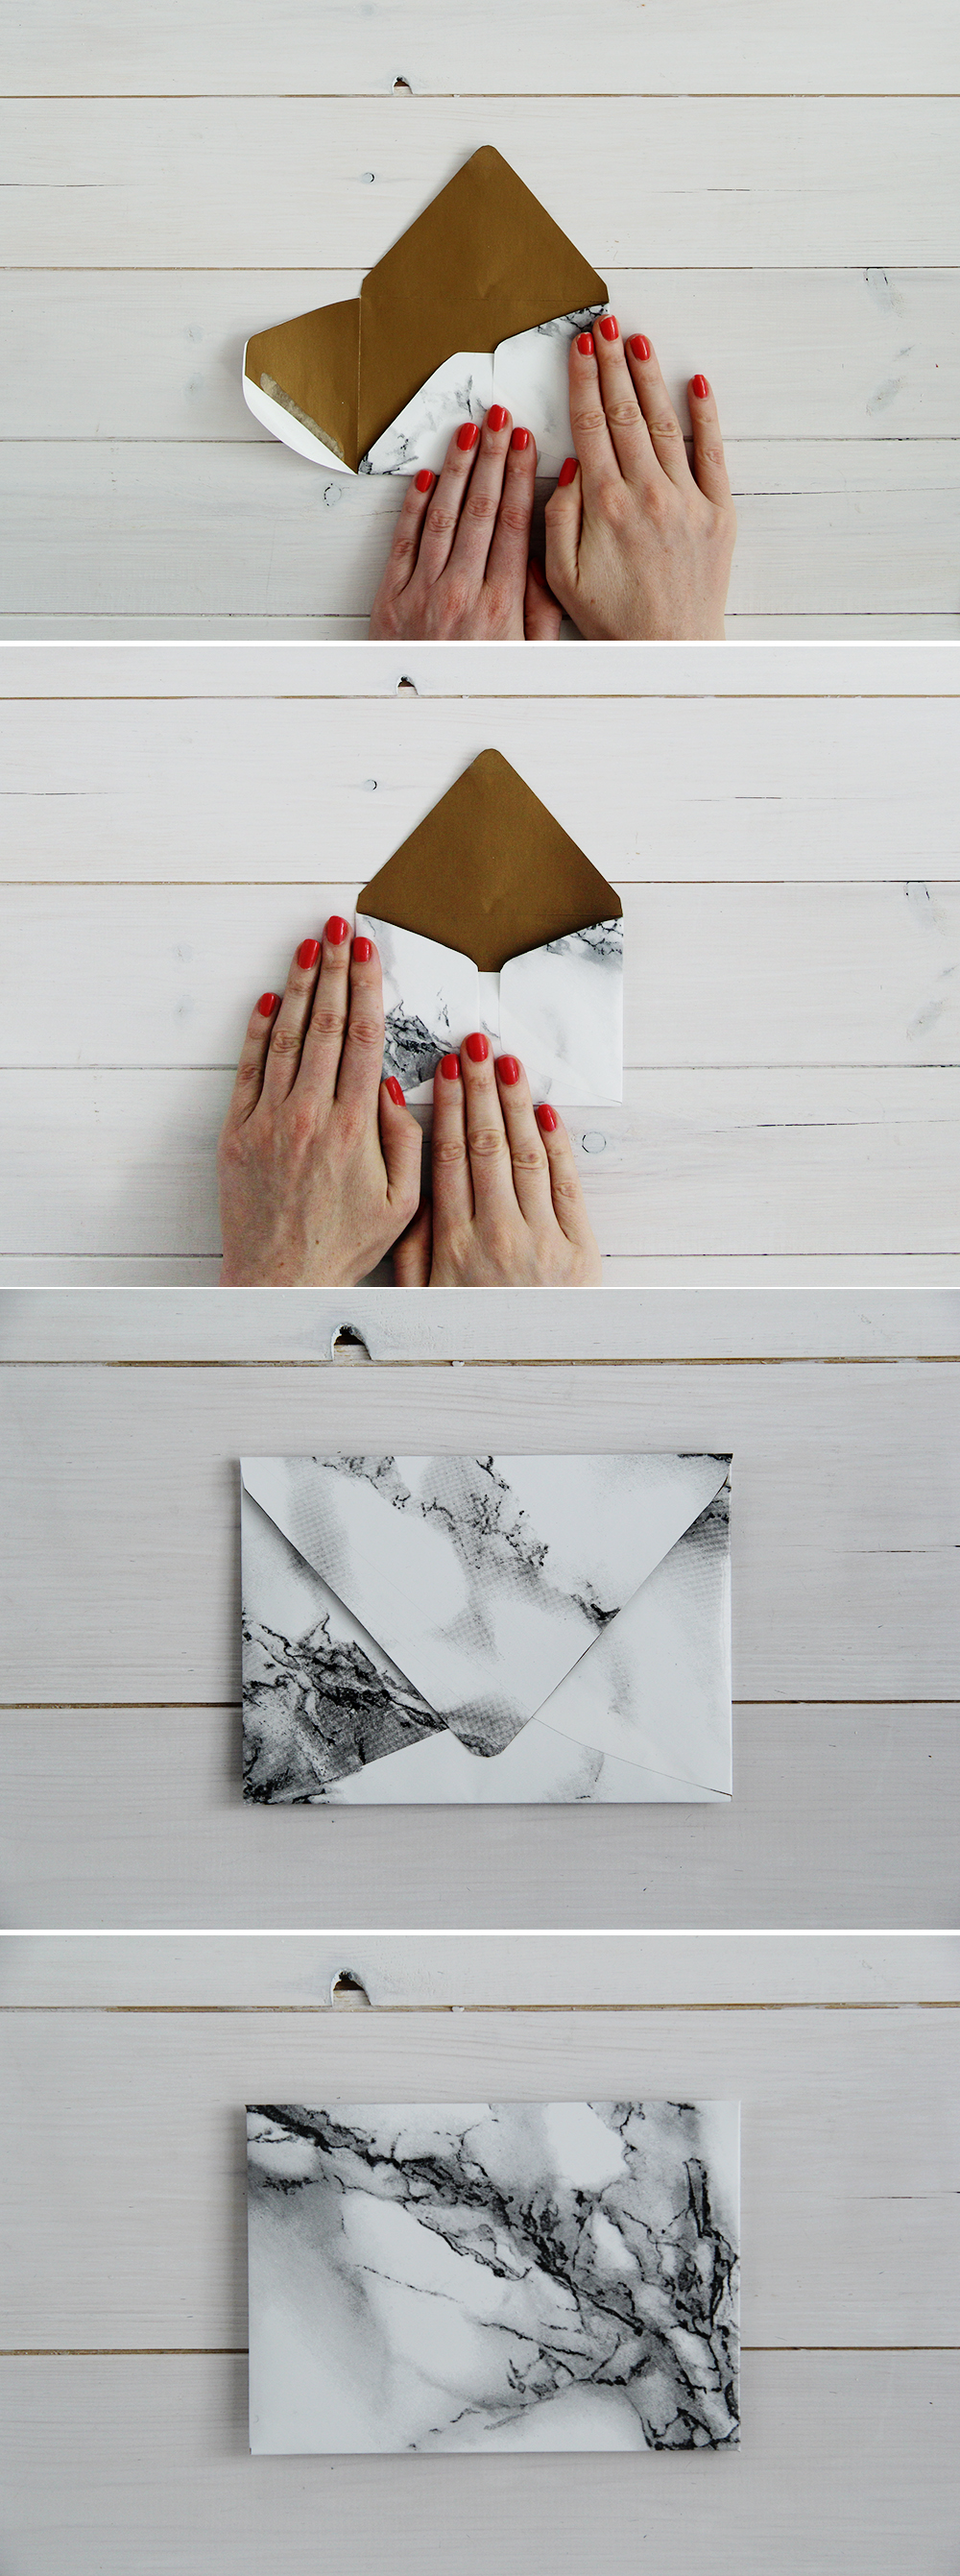
Perfect for all those letters you’ve been meaning to write. No excuses!
Original article and pictures take fallfordiy.com site
Комментариев нет:
Отправить комментарий